

Restoring Your Damaged Stone Countertop: Steps to Take Next
- Liane Ganji
- May 14
- 3 min read

Stone countertops add elegance and durability to kitchens and bathrooms, but damage can happen. Whether it’s a chip, crack, stain, or dull surface, knowing how to respond quickly and effectively can save your countertop and extend its life. This guide walks you through practical steps to restore your damaged stone countertop, helping you bring back its original beauty.

Assess the Damage Carefully
Start by examining the damage closely. Different types of stone—granite, marble, quartz, or soapstone—react differently to damage and require specific care.
Chips and cracks: Look for small chips on edges or cracks running across the surface.
Stains: Identify discoloration caused by spills like wine, oil, or acidic substances.
Dullness or scratches: Check if the surface has lost its shine or has visible scratches.
Understanding the type and extent of damage helps you decide whether you can fix it yourself or need professional help.
Clean the Surface Thoroughly
Before any repair, clean the countertop to remove dirt, grease, and residues. Use a pH-neutral cleaner designed for stone surfaces or a mild dish soap diluted in warm water.
Avoid acidic or abrasive cleaners that can worsen damage.
Use a soft cloth or sponge to gently wipe the surface.
Dry the area completely with a microfiber cloth.
A clean surface ensures better adhesion for repair materials and prevents stains from setting deeper.
Repair Small Chips and Cracks Yourself
For minor chips and cracks, DIY repair kits are available for most stone types. These kits usually include epoxy resin or color-matched fillers.
Prepare the area by cleaning and drying it.
Mix the filler according to instructions.
Apply carefully to the damaged spot using a small spatula or toothpick.
Smooth the surface and remove excess filler.
Let it cure fully, usually 24 to 48 hours.
DIY repairs work best for small, shallow damage. For larger cracks or deep chips, professional restoration is safer.
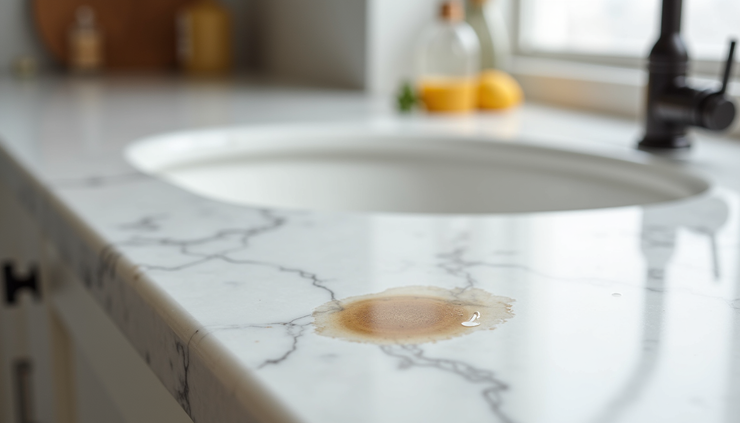
Remove Stains with Targeted Treatments
Stains on stone countertops can be stubborn but often respond to specific treatments.
Oil-based stains: Use a poultice made from baking soda and water. Apply it thickly, cover with plastic wrap, and leave for 24 hours before wiping off.
Organic stains (coffee, wine): Use a poultice with hydrogen peroxide and a few drops of ammonia.
Rust stains: Require commercial rust removers safe for stone.
Always test treatments on a small, hidden area first to avoid further damage.
Restore Shine and Polish
After repairs and stain removal, your countertop might look dull. Restoring its shine improves appearance and protects the surface.
Use a stone polish designed for your countertop type.
Apply polish with a soft cloth in circular motions.
Buff the surface gently to bring out the natural luster.
Avoid wax-based products, which can build up and attract dirt over time.
Know When to Call a Professional
Some damage requires expert attention:
Large cracks that compromise structural integrity.
Deep chips that affect usability.
Extensive staining that home treatments cannot remove.
Etching or surface damage on delicate stones like marble.
Professional stone restoration specialists have tools and materials to grind, fill, polish, and seal your countertop, often making it look like new.
Prevent Future Damage
Once your countertop is restored, protect it with these habits:
Use cutting boards and trivets to avoid scratches and heat damage.
Clean spills immediately, especially acidic liquids like lemon juice or vinegar.
Seal porous stones regularly with a high-quality stone sealer.
Avoid harsh chemicals or abrasive scrubbers.
Regular maintenance keeps your countertop looking great and reduces the chance of costly repairs.
Restoring a damaged stone countertop is manageable with the right approach. Start by assessing the damage, clean carefully, and try small repairs or stain removal yourself. For serious issues, professionals such as www.stonecraftersco.com can bring back your countertop’s beauty and strength. Taking steps to protect your stone surface afterward will keep it looking its best for years.


Comments